You know that moment when the wind hits the house and your window buzzes… or you feel a cold line of air along the window sill? That’s not just annoying, it’s your home leaking comfort (and money).
Replacing it with uPVC is a brilliant upgrade, but here’s the thing: the window itself isn’t the magic, the installation is. Get it right and you’ll enjoy a warmer, quieter home. Get it wrong and you could be dealing with draughts, water ingress, misaligned locks, and a window that never opens quite smoothly.
This guide breaks down how to install uPVC windows from start to finish: measuring, prepping, packing, fixing, sealing, all the details that make the difference between “looks okay” and “works flawlessly.”
And if the DIY route feels like it’s tipping from “project” into “risk,” I’ll show you the exact point where hiring professionals becomes the best value decision, because once it’s installed properly, it’s done for years.

How much does uPVC window installation cost?
One of the first questions homeowners ask before committing to new windows is: what’s this actually going to cost me? It’s a fair question, and while there’s no single answer (every job is different), here’s a realistic breakdown of what to expect.
Typical costs per window (supply and install)
- Small casement window: £400–£600
- Medium casement window: £500–£800
- Large picture or fixed window: £600–£1,000+
- Bay or bow window: £1,500–£3,500+
- Sliding sash window: £700–£1,200
These are ballpark figures for uPVC frames with double glazing. Aluminium frames or triple glazing will sit at the higher end.
What affects the price of uPVC window installation?
- Number of windows: Most installers offer better value per window when fitting multiple units in one visit.
- Window style and size: Bay windows and large picture windows take significantly longer to install than a standard casement.
- Storey height and access: First-floor windows may require additional equipment or scaffolding, which adds to the cost.
- Condition of the existing opening: If the reveal is crumbling, damp, or out of square, remedial work is needed before fitting can begin.
- Glazing specification: Double glazing is standard. Triple glazing or specialist acoustic/solar control glass costs more.
- Location: Labour rates vary by region; Essex and the South East tend to sit in the mid-to-upper range nationally.
DIY vs professional installation: the real cost comparison
DIY looks cheaper on paper, but factor in tool hire, materials, the time it takes, and the risk of getting something wrong, and the gap narrows quickly. A poorly sealed or misaligned window can lead to water ingress, draughts, and lock failures that cost more to fix than the original professional installation would have.
With Ken Rhodes, you get a clear, no-obligation quote upfront, professional fitting by an experienced team, and a long-term guarantee that protects your investment. Get a free quote today and find out exactly what your installation will cost.
Building Regulations for uPVC window installation in the UK
Building Regulations might not be the most exciting part of fitting new windows, but skipping this step can create serious problems down the line — from issues when selling your home to failed inspections and remedial costs.
Do you need Building Regulations approval for uPVC window installation?
Yes, in most cases. In England, replacing windows is controlled work under Building Regulations, specifically Part L (energy efficiency) and Part F (ventilation). The windows you install must meet minimum thermal performance standards, and in many cases, trickle vents must be included to provide background ventilation.
How is compliance demonstrated?
There are two routes:
- Self-certification via a competent person scheme: If your installer is registered with a scheme such as FENSA or Certass, they can self-certify that the installation complies with Building Regulations. Once the work is complete, they notify the local authority and issue you a certificate. This certificate is important — it’s your proof of compliance and you’ll need it when you come to sell the property.
- Local authority building control: If you’re doing the work yourself (DIY), you can’t self-certify. Instead, you’ll need to notify your local building control department before work starts and pay for an inspection. They’ll check the installation meets the required standards.
What are the key regulations to be aware of?
- Part L (Conservation of Fuel and Power): Replacement windows must achieve a minimum energy efficiency standard. For uPVC double glazing, this typically means a Window Energy Rating (WER) of Band C or better, or a U-value of 1.4 W/m²K or lower for the whole window.
- Part F (Ventilation): When replacing windows, you must ensure the new windows provide at least the same level of background ventilation as those being removed. In practice, this usually means fitting trickle vents if the original windows had them, or if the room would otherwise be under-ventilated.
- Listed buildings and conservation areas: If your property is listed or sits within a designated conservation area, you’ll likely need planning permission before making any changes to windows, regardless of like-for-like replacement. Always check with your local planning authority first.
What happens if you don’t comply?
An installation that doesn’t comply with Building Regulations is technically unauthorised work. If you come to sell your property and can’t produce the relevant certificate, your solicitor will flag it and the sale can stall. The buyer may request a retrospective inspection or an indemnity insurance policy — neither of which is straightforward or free.
When Ken Rhodes carries out your uPVC window installation, compliance is handled as part of the service. We’re FENSA registered, which means your installation is self-certified, reported to your local authority, and you receive your certificate automatically. One less thing to worry about
uPVC window installation by window type
Not all windows are installed the same way. While the core principles — measure, pack, fix, seal — apply across the board, different window styles bring their own challenges and considerations. Here’s what to bear in mind for the most common types.
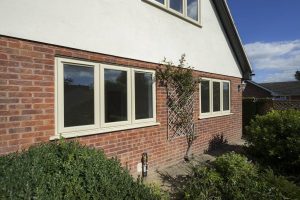
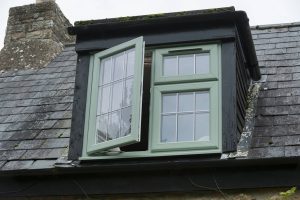
Casement windows
The most straightforward installation of the lot. A casement frame is typically a single rectangular unit that drops into the prepared opening, gets packed level, fixed, and sealed. The main things to get right are the hinge alignment (so the sash swings freely and closes flush) and the handle/locking point alignment. If the frame is even slightly out of square, the sash will bind or fail to lock properly.
Sliding sash windows
Sliding sash windows require more precision around the weight and balance of the sashes. Modern uPVC sliding sash windows use spiral balances rather than traditional weights and pulleys, but they still need to be correctly tensioned for the sashes to slide smoothly and hold position when open. Getting this right during installation, rather than adjusting it afterwards, saves a lot of frustration.
Tilt and turn windows
The dual-function mechanism on tilt and turn windows means the hardware tolerances are tighter than a standard casement. The frame must be perfectly plumb and square, or the tilt function will feel stiff and the full-turn opening position won’t seal cleanly. These windows are also often heavier due to larger glass areas, so correct load-bearing packing is especially important.
Bay and bow windows
Bay and bow window installation is significantly more complex than fitting a single frame. Multiple frames need to be joined at precise angles (typically 90°, 135°, or 150° for bays), with structural support — often a steel or timber cill plate — beneath. The frames must all be individually levelled and then tied together so the overall unit is square and rigid. Bay windows are one of the jobs where professional installation makes the most difference; a small error in one frame compounds across the whole bay.
Fixed/picture windows
Fixed windows have no opening sashes, which removes the alignment challenges of moving parts, but they tend to be larger and heavier. The priority here is correct glazing packer placement so the unit sits square in the frame, and ensuring the external seal is completely watertight — there’s no sash to act as a secondary barrier against wind-driven rain.
How long does uPVC window installation take?
It’s one of the most practical questions to ask before booking, and the honest answer is: it depends. But here’s a realistic guide to help you plan.
Single window: An experienced installer can typically fit a single standard casement window in 2–4 hours, including removal of the old window, preparation of the opening, fitting, sealing, and finishing.
Full house: For a typical Essex semi-detached or detached home with 8–12 windows, expect the job to take 1–2 full days with a two-person team. Larger properties or more complex window types will extend this.
What can make installation take longer?
- Difficult access: Upper-floor windows, narrow side returns, or restricted external access all slow things down.
- Poor condition of the existing opening: If old frames are embedded in mortar, the reveals are damaged, or there’s unexpected damp, the removal and prep stage takes longer.
- Complex window types: Bay windows, sliding sash, and large fixed panes all take more time than a standard casement.
- Remedial work: Cracked or crumbling reveals, rotten lintels, or missing cavity closers need to be addressed before fitting can begin — this adds time but it’s not something that should be skipped.
What disruption should you expect?
During installation, the opening will be uncovered for a period, so it’s worth bearing in mind:
- Weather: Most installers work window by window to minimise the time any opening is exposed. If the forecast is poor, your installer may adjust the order of work.
- Noise: Removal of old frames and drilling for fixings is noisy but short-lived. Most of the fitting work is relatively quiet.
- Dust: Cutting out old mortar or render creates dust. Laying down protective sheets and keeping internal doors closed helps contain it.
- Access to rooms: Fitters will need clear access to each window internally and, where possible, externally. Moving furniture away from window walls before the team arrives speeds things up.
By the end of a one-day install, your windows will be fitted, sealed, and operational. The home won’t be a building site — a good installation team leaves the job clean and tidy.
uPVC window aftercare and maintenance
Once your new windows are in, a little routine care goes a long way. uPVC is low maintenance by design, but “low maintenance” doesn’t mean “zero maintenance.” Here’s what to do to keep your windows performing exactly as they should for years to come.
Cleaning the frames
Clean uPVC frames with warm soapy water and a soft cloth every few months, or more often if you’re near a busy road or coastal area. Avoid abrasive cleaners, white spirit, or bleach — these can dull or damage the surface over time. For stubborn marks, a dedicated uPVC cleaner from a hardware shop works well without causing harm.
Lubricating the hinges and hardware
Once or twice a year, apply a small amount of light oil or dedicated window lubricant to hinges, handles, and locking points. This keeps everything moving smoothly, prevents wear, and stops that stiff-handle feeling that creeps in over time. Avoid WD-40 for this — it’s a moisture displacer, not a long-term lubricant, and it can attract dirt to the mechanism.
Checking and maintaining the seals
The rubber gaskets that run around the sash perimeter are what give you a draught-free, weathertight seal. Inspect them annually — they should be pliable and sitting firmly in the frame. If they’re starting to harden, crack, or pull away at the corners, they can be replaced relatively inexpensively. Doing this promptly is far cheaper than dealing with the draughts and water ingress that follow if you leave it.
Also check the external silicone bead around the frame where it meets the brickwork or render. If it’s cracking or pulling away in places, reseal it. External silicone is your first line of defence against wind-driven rain getting behind the frame.
Keeping drainage channels clear
uPVC window frames have small drainage slots or holes (usually on the outer face of the bottom rail) that allow any water that enters the glazing rebate to drain away safely. Over time, these can become blocked with debris, especially in sheltered spots where leaves and dirt accumulate. Clear them out with a thin tool or a blast of compressed air as part of your annual check.
Early warning signs that something needs attention
- Condensation between the panes: This means the hermetic seal on the double-glazed unit has failed. The unit itself needs replacing — this isn’t something that can be fixed with sealant.
- Draughts around the sash: Usually means the hinges need adjusting, the seals need replacing, or the sash has dropped slightly and needs realigning. All straightforward jobs.
- Stiff or difficult operation: Hinges need lubricating, or the sash may need adjustment. Don’t force it — repeated force causes wear to the locking points and frame.
- Water on the internal sill after rain: Could be a failed external seal, a blocked drainage channel, or a gasket issue. Worth investigating promptly before any water finds its way into the wall.
If you spot any of these issues and you’re not sure how to address them, Ken Rhodes offers a maintenance and repairs service across Essex and the South East. It’s always better to deal with a small issue early than a bigger one later.

Get your uPVC windows installed by Ken Rhodes
If you’re in Essex/the South East and you want the job done properly, without the stress, guesswork, or “I hope that seal holds” feeling, Ken Rhodes can take care of everything from start to finish.
Ken Rhodes is a family-run double glazing company based in Essex, known for installing uPVC windows and supporting homeowners with upgrades that improve comfort, security, and energy efficiency. With professional fitting, you’ll get a window that looks great, operates smoothly, and performs exactly as it should for years.
Why choose Ken Rhodes for uPVC window installation?
- Expert fitting for a clean finish and smooth operation
- Correct packing, fixing, sealing, and drainage, done the right way
- Local, trusted service across Essex and surrounding areas
- Extra peace of mind with long-term guarantee options (including a 15-year insurance-backed guarantee advertised via third-party listings)
Ready to upgrade your windows without the headache?
Speak to the Ken Rhodes team for advice, a quote, and a professional installation you won’t have to worry about again.